Our Services
Jack Britt Area • Fayetteville, NC

Overhead Garage Ceiling Tear-Out, Drywall Rebuild & Level 4 Finish

Clearing a failed, collapsed ceiling, joist fastener extraction, hanging 1/2-inch UltraLight drywall around attic stairs and door track hangers, and floating smooth to Level 4 paint-ready finish.

Demolition: Complete Ceiling Removal Back to Bare Joists Substrate: 1/2" High-Strength UltraLight Gypsum Finish: Multi-Pass Level 4 Smooth Finish on Stilts
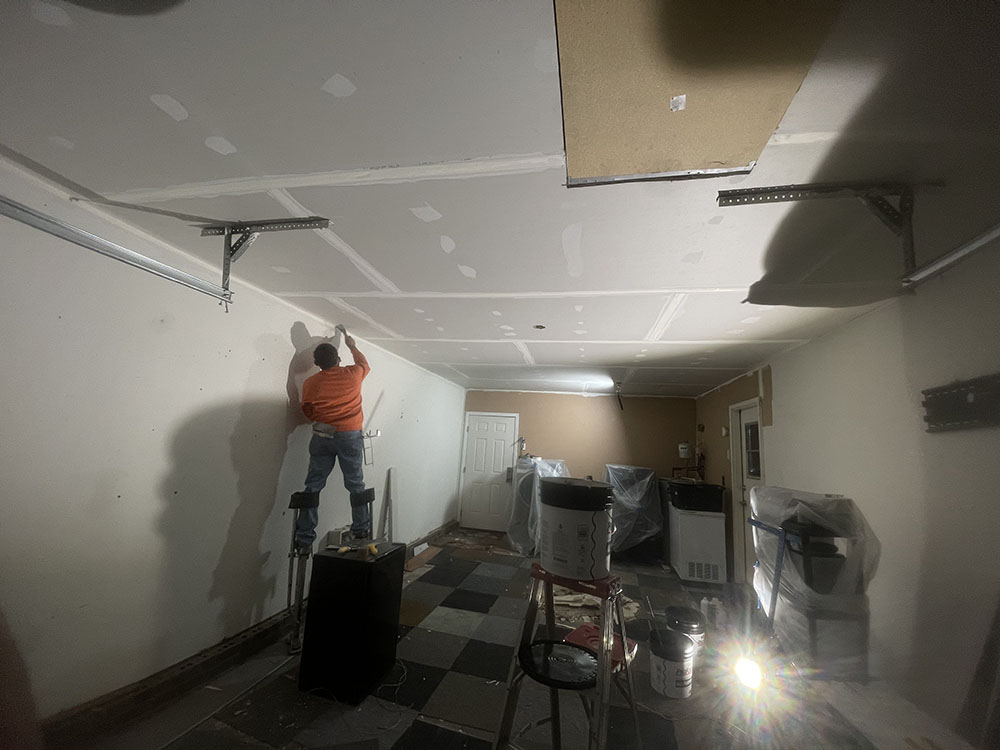
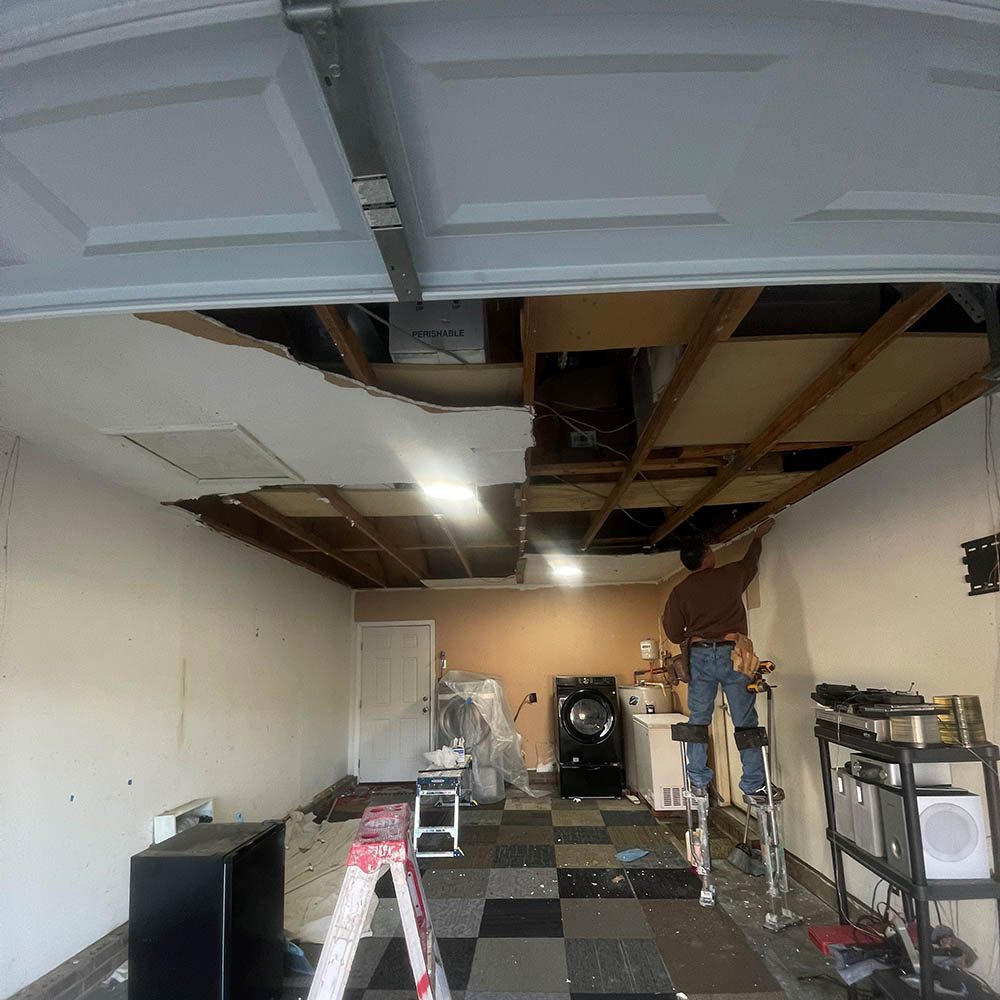
Finisher on stilts clearing remaining sagging drywall from garage ceiling joists

Clearing Compromised Drywall to Bare Joists

In this two-car garage, repeated fastener pull-through and structural fatigue had caused the majority of the original ceiling to collapse under its own weight, leaving broken gypsum dangling above parked vehicles, appliances, and storage. Attempting to screw failed, sagging drywall back up into the joists is a safety hazard because the brittle chalk core has already pulled past the fasteners. A lasting repair required a complete tear-out back to sound framing.

  • Controlled Ceiling Removal: Working safely on drywall stilts, we pulled down all remaining compromised drywall sections back to bare ceiling trusses.
  • Fastener Clearing & Joist Check: We pulled old nails and failed screws across every joist, inspecting framing level and clearing the wood to ensure a flat plane for new board.
  • Appliance & Workspace Protection: The homeowner's washer, dryer, water heater, and storage racks were masked with heavy plastic sheeting and drop cloths to capture falling gypsum debris.
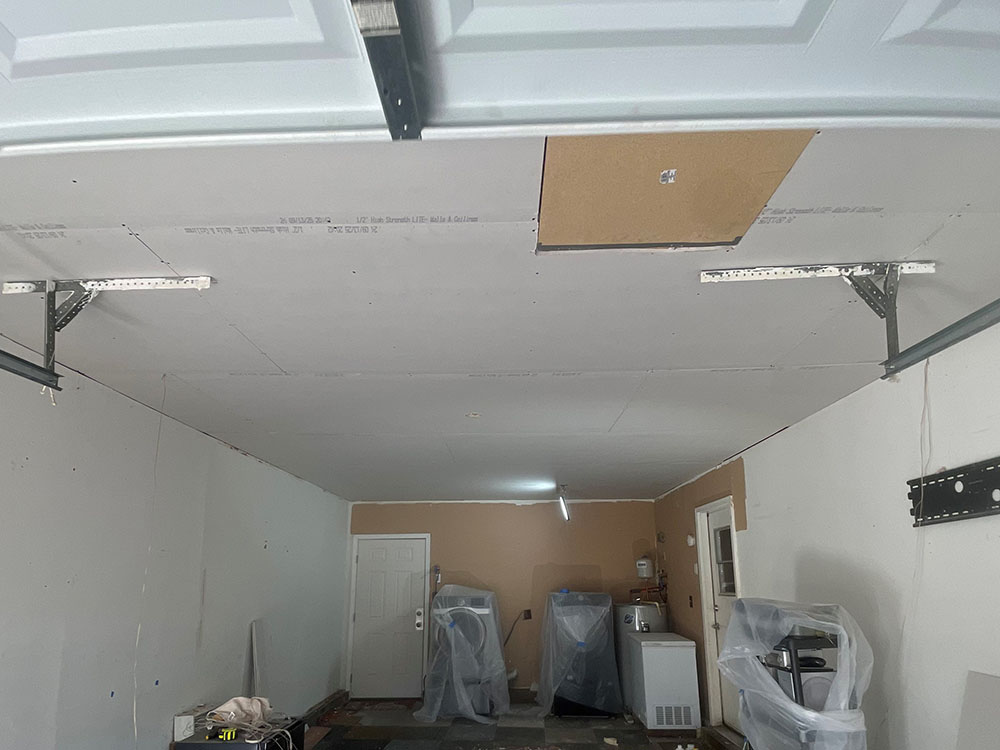
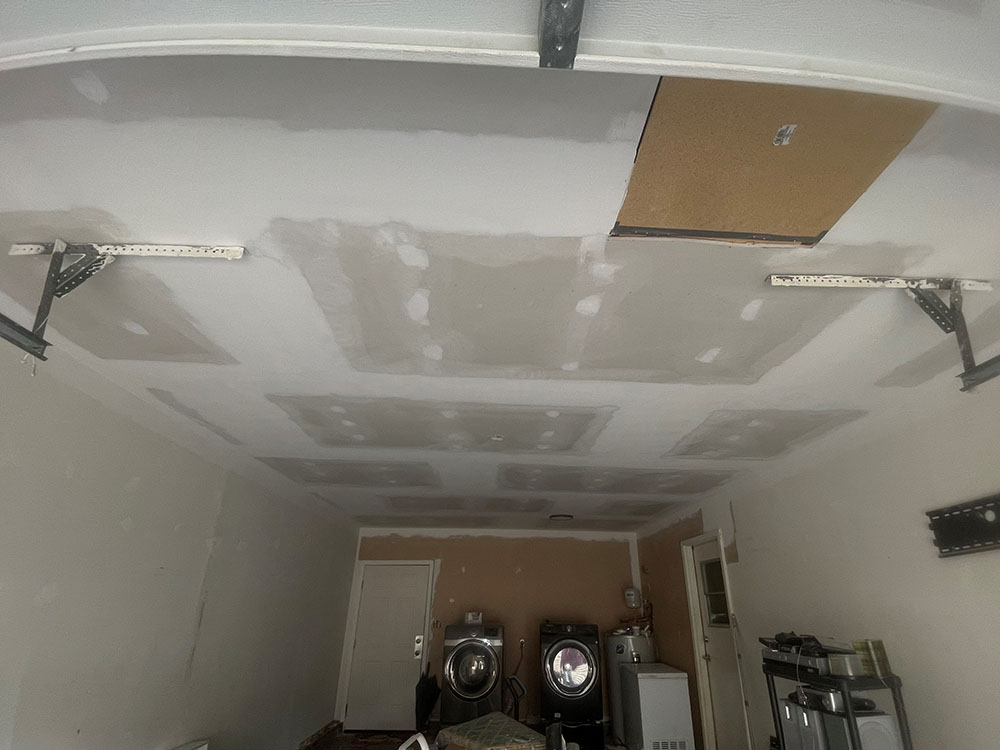
1/2-inch UltraLight drywall panels hung tight to ceiling joists around garage door tracks

1/2" UltraLight Board & Mechanical Integration

Hanging full drywall sheets overhead in an active garage requires maneuvering panels around fixed hardware without dismantling roll-up door track assemblies or attic stairways.

  • 1/2" High-Strength UltraLight Gypsum: We installed modern UltraLight drywall panels, which offer superior sag resistance on wide spans while reducing dead-load strain on joists.
  • Door Track Navigation: Scribed and cut panels to slide tight around overhead garage door tracks, angle-iron supports, and motor mounting brackets.
  • Attic Access Framing: Fitted sheets flush around the perimeter of the pull-down attic hatch, ensuring clean margins for trim casing.
  • Tight Screw Spacing: Fastened with coarse-thread bugle-head drywall screws spaced closely into the joists to provide holding power against temperature swings.
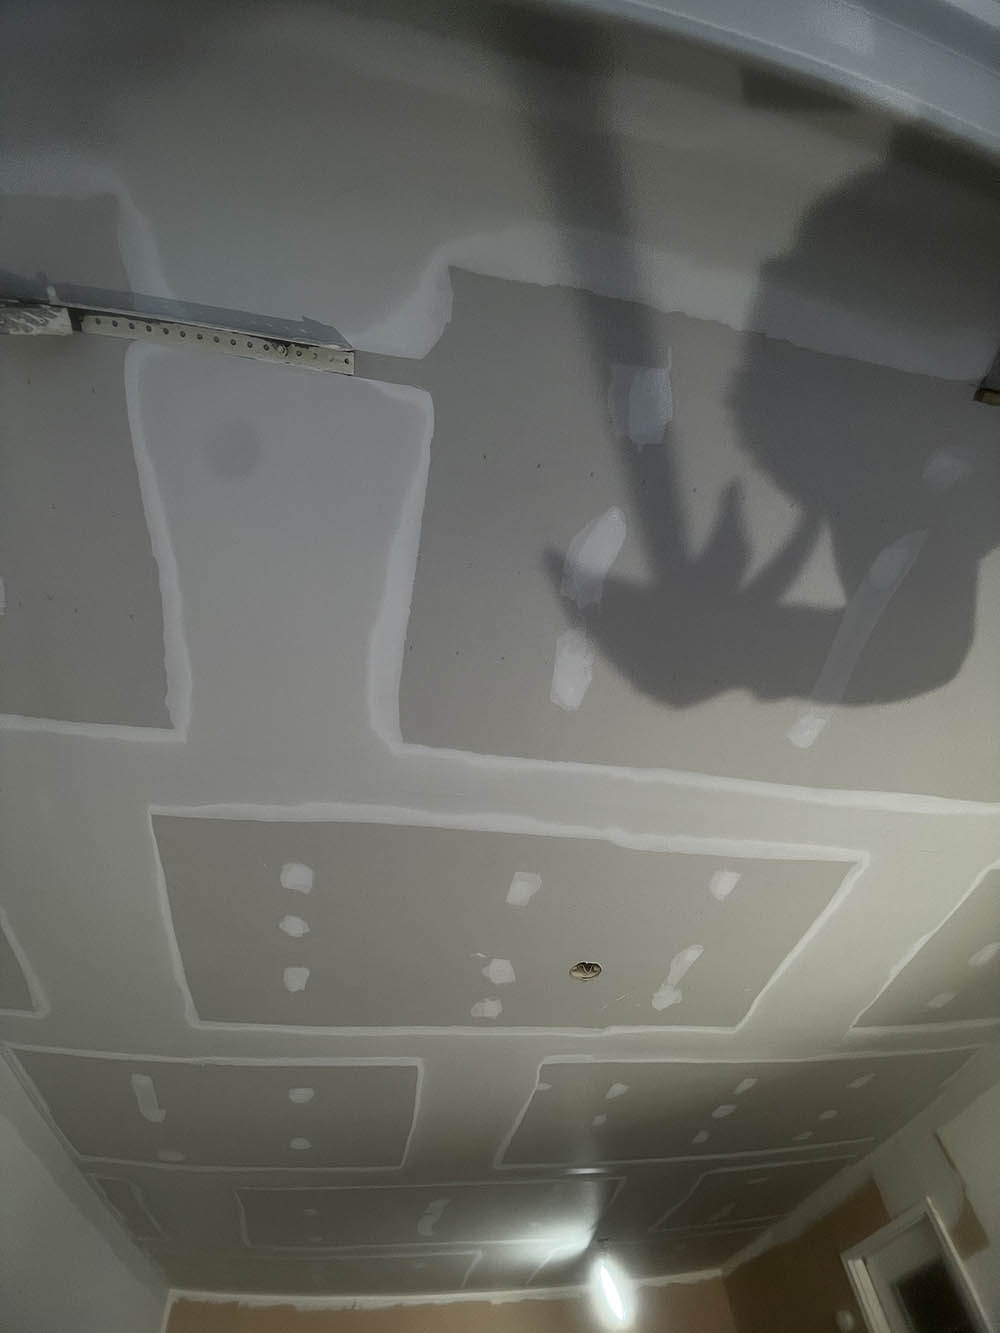
Overhead garage ceiling taped, bedded, and floated to a smooth Level 4 finish

Stilt Work, Joint Bedding & Level 4 Float

To eliminate joint shadowing and leave a flat ceiling plane, our crew executed a complete multi-coat finishing cycle on stilts under directional work lights.

  • Tape Bedding in Setting Mud: High-tensile joint tape was embedded in setting-type compound across all recessed edges and butt joints to resist thermal expansion.
  • Multi-Pass Feathering: Two wide skim coats of lightweight finishing mud were floated 12 to 14 inches past all seams, crowning joints imperceptibly to leave a flat surface under overhead lights.
  • Sanded Smooth to Level 4: Sanded smooth to a ridge-free Level 4 standard. While R&R provides full painting services, the homeowner chose to handle final prime and paint themselves, receiving a smooth, ready-to-coat ceiling.

Jobsite Progression & Overhead Finishing Walkthrough

Recorded field photos detailing tear-out on stilts, board hanging, and multi-pass mud floating.

Drywall finisher on stilts clearing collapsed ceiling drywall from bare joists
Demolition Stage

Controlled Ceiling Tear-Out

Clearing collapsed and sagging drywall back to bare ceiling trusses on stilts.

1/2-inch UltraLight drywall panels hung tight to ceiling joists around garage door tracks
Hanging Stage

Overhead Panel Fastening

1/2" UltraLight board hung tight across joists around attic access and door tracks.

Finisher on stilts taping perimeter ceiling joint near work lights
Taping Pass

Perimeter Joint Bedding

Embedding high-bond joint tape along perimeter corners and factory recessed seams on stilts.

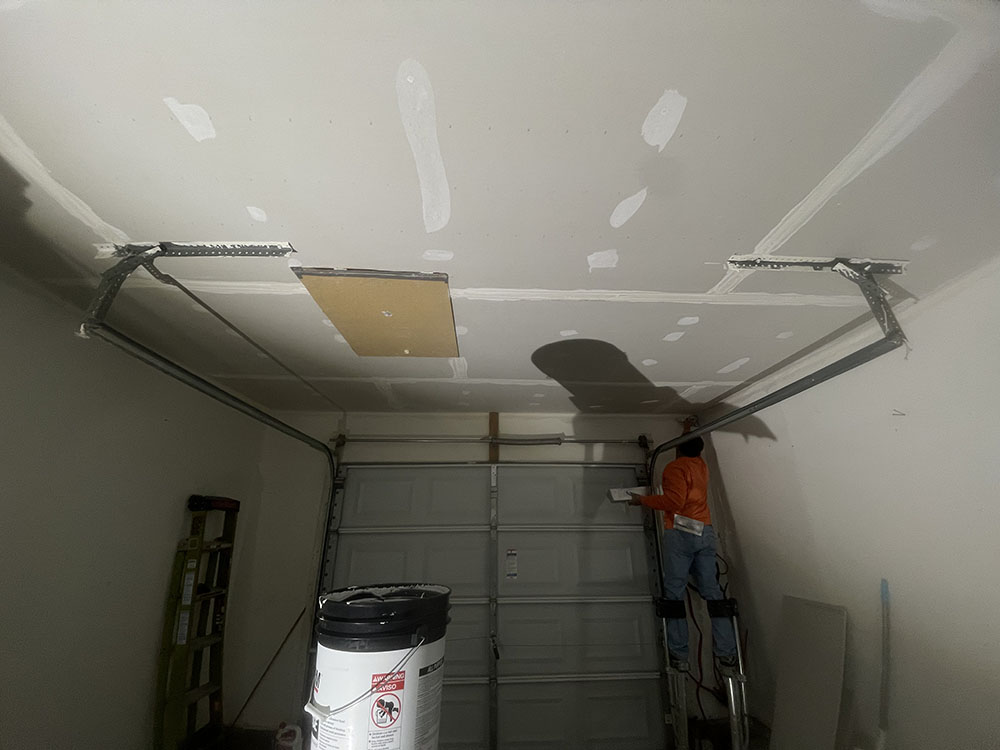
Finisher embedding tape along ceiling seams near overhead roll-up garage door
Seam Taping

Bedding Overhead Joints

Applying base coats and embedding tape tight around overhead roll-up door hardware.

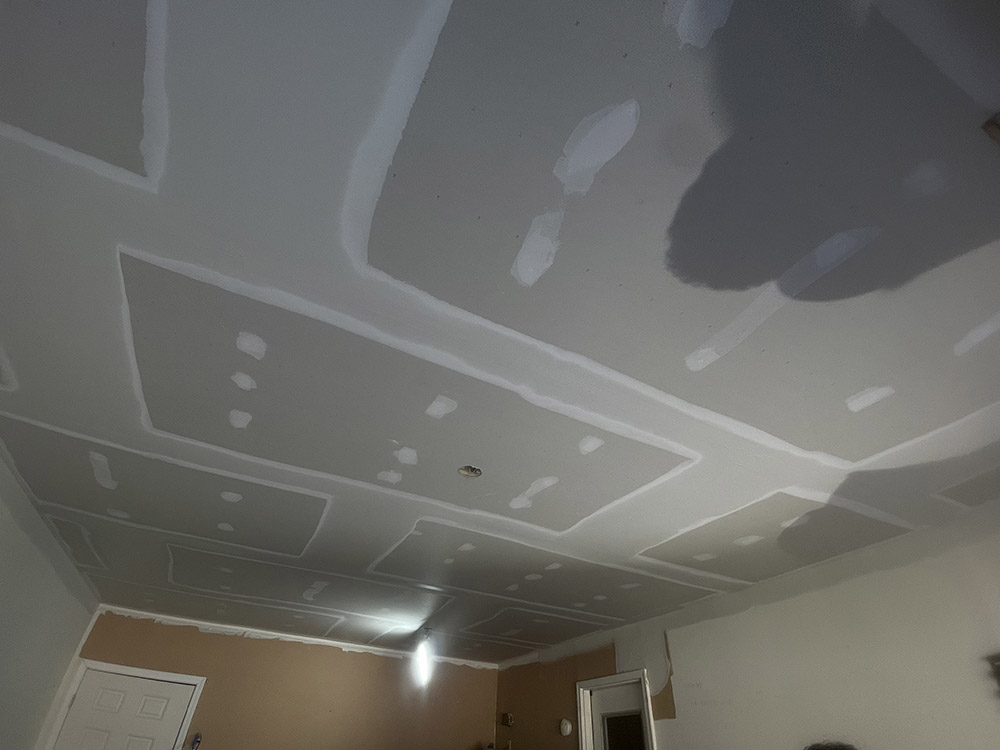
Wide feathered joint compound passes across garage ceiling butt joints
Finishing Pass

Wide Compound Feathering

Floating compound wide across butt joints and screw lines to eliminate seam ridges.

Upward view of multi-pass drywall finish floating flat across garage ceiling
Level 4 Float

Overhead Surface Skim

Upward view showing feathered mud passes and fastener heads prepped for sanding.

Completed Level 4 garage ceiling drywall finish around attic access and door tracks
Completed Finish

Level 4 Smooth Overhead Plane

Seamless, ridge-free ceiling plane sanded flat and ready for homeowner prime and paint.

Project Specifications Summary

Jobsite specifications, drywall substrates, and finishing protocols utilized during the Jack Britt ceiling replacement.

Location & Failure Cause

  • Neighborhood: Jack Britt Area, Fayetteville, NC.
  • Space: Residential 2-car attached garage.
  • Failure Cause: Fastener pull-through and dead-weight ceiling collapse.
  • Decision: Full tear-out back to trusses to guarantee safety.

Materials & Fasteners

  • Sheetrock: 1/2" High-Strength UltraLight Gypsum Ceiling Panels.
  • Fasteners: Coarse-thread bugle-head drywall screws spaced closely.
  • Framing Clearing: Joists pulled clean of all original nails and screws.
  • Mechanical Obstacles: Scribed tight around door tracks and attic hatch.

Finishing Protocol

  • Joint Reinforcement: High-tensile joint tape embedded in setting mud.
  • Floating Passes: Two wide skim coats of lightweight topping compound.
  • Finish Level: Level 4 smooth, ridge-free finish sanded on stilts.
  • Hand-Off: Delivered fully prepped for homeowner self-painting.
Call (910) 476-1872 Text Photos